As the architecture, engineering, and construction (AEC) industries move towards intelligent building design and visualization, 2D to 3D conversion has become a critical process. Whether it's upgrading legacy CAD drawings, creating BIM models, or preparing for visualization and VR/AR integrations, converting 2D designs into accurate 3D models can dramatically improve coordination, design validation, and stakeholder communication.
However, 2D to 3D conversions are more than just extruding shapes—they require an understanding of the project’s design intent, data precision, and interoperability. This article walks you through the key steps, tools, and common pitfalls to watch out for when transitioning from 2D drawings to 3D models.
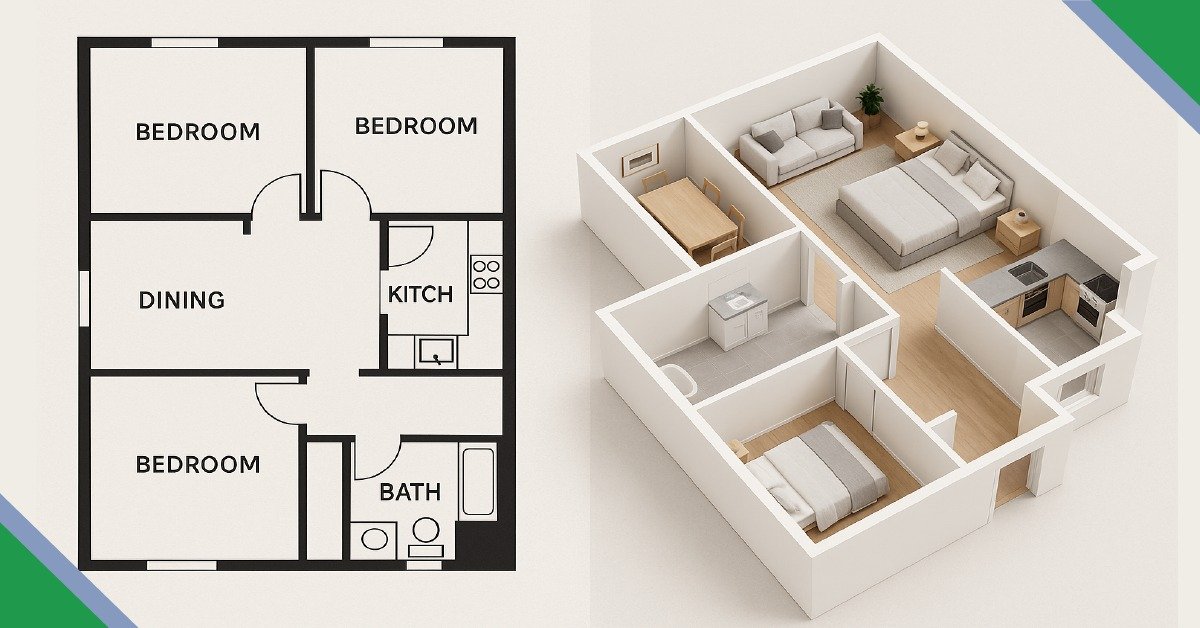
Why Convert from 2D to 3D?
2D CAD drawings have long been the industry standard, but they often lack context, dimensional depth, and coordination across disciplines. A 3D model provides:
- Enhanced spatial understanding
- Better visualization for clients and stakeholders
- Clash detection between disciplines
- Smoother transition to BIM workflows
- Compatibility with modern tools like Revit, Navisworks, VR platforms, and facility management systems
Step-by-Step Process for 2D to 3D Conversion
1. Collect and Audit 2D Drawings
Start by gathering all the relevant 2D files: floor plans, sections, elevations, and details. It's essential to audit these drawings for:
- Accuracy of dimensions
- Consistency in layer usage
- Completeness (missing elements can cause major delays)
- Overlapping or redundant geometry
2. Understand the Design Intent
Not all information is evident in 2D views. Understanding what the client or architect intended—especially in terms of heights, slopes, material transitions, and spatial relationships—is crucial before starting the 3D modeling process.
In many cases, additional inputs such as photographs, hand sketches, or verbal briefs are used to bridge gaps.
3. Choose the Right Tools
Depending on the output goal—visualization, documentation, or BIM—you’ll need to select the appropriate 3D modeling software.
- AutoCAD 3D – For basic 3D models derived from DWG files
- SketchUp – Great for conceptual massing and visual presentation
- Revit – Ideal for BIM-ready models with parametric elements
- SolidWorks or Inventor – For mechanical or industrial projects
- 3ds Max – For rendering and photorealistic outputs
- Blender – Open-source alternative for modeling and rendering
For projects requiring high levels of detail (LOD300 and beyond), Revit is usually the most efficient tool, especially when aligned with BIM standards.
4. Establish Layers, Levels, and Grids
Before modeling begins, set up a project framework:
- Define story levels (ground, first floor, terrace, etc.)
- Establish grids and axes for structural alignment
- Align units and coordinate systems between the 2D and 3D environments
This ensures dimensional accuracy and interoperability with other design disciplines.
5. Start Modeling Core Elements First
Start with primary architectural components such as:
- Walls and slabs
- Columns and beams
- Roofs and staircases
- Openings (windows, doors, etc.)
Once the structure is in place, move on to secondary elements like furniture, fixtures, MEP components, and finishes.
6. Verify Geometry and Maintain Accuracy
Once the 3D model is built, it must be cross-checked against original 2D drawings. Look for:
- Correct wall thicknesses
- Room dimensions
- Height levels and floor transitions
- Alignment of structural components
This step often involves redlining, revisions, and client validation.
7. Export and Collaborate
Export your 3D model in a format compatible with your stakeholders’ workflows, for example:
- IFC – For BIM interoperability
- FBX – For visualization and DCC pipelines
- OBJ – For neutral geometry exchange and 3D printing
Ensure all metadata, layers, and naming conventions are standardized.
Common Mistakes to Avoid
- Assuming 2D drawings are 100% accurate: Minor inaccuracies in the original CAD files can lead to major errors in 3D. Always cross-check measurements and clarify unclear details before modeling.
- Ignoring building codes or BIM standards: Especially when converting to Revit or BIM platforms, follow regional or project-specific standards (e.g., LOD, COBie, ISO 19650).
- Over-modeling too early: Avoid modeling fine details before the core structure is approved to reduce rework if major design changes occur later.
- Not maintaining file cleanliness: Cluttered models with unreferenced geometry, redundant components, or disorganized layers can slow down workflows and increase file size.
- Lack of communication with clients: Design intent, spatial logic, and non-documented assumptions must be communicated continuously to ensure the 3D model reflects real-world expectations.
Conclusion: Getting It Right from the Start
2D to 3D conversion is a bridge between traditional drafting and intelligent design modeling. When done right, it not only improves project visualization and stakeholder communication but also sets the foundation for advanced BIM, rendering, and facilities management workflows.
However, the success of this transition depends on accuracy, software expertise, and a strong understanding of architectural principles.
About DigitiseIT
At DigitiseIT, we specialize in high-precision 2D to 3D CAD conversions for architectural, construction, and engineering projects. Whether you need Revit-ready BIM models or visual 3D files for marketing and design, our team ensures a smooth, error-free transformation from your 2D plans.
Looking to convert your 2D CAD drawings into accurate 3D models? Reach out to us and let our team of experienced drafters and BIM experts bring your designs to life.